Friendship Day

It’s National Friendship Day on Sunday, taking time to show our friends how important they are to us is a good lesson to teach our little ones, recognising and appreciating good friendships is critical in this current world and knowing who you can love, and trust is a great skill to learn from an early age.

It’s National Friendship Day on Sunday, taking time to show our friends how important they are to us is a good lesson to teach our little ones, recognising and appreciating good friendships is critical in this current world and knowing who you can love, and trust is a great skill to learn from an early age.

National Friendship Day offers a special opportunity to go beyond the normal, everyday appreciation of friends.

So, what can we do to show our appreciation and what can out little ones do for their friends?

Spend Time with a Friend

Beyond cards or gifts, truly the best way to show a person how much their friendship means is by spending quality time with them. Offer to take them for a cup of coffee, have a chat over an ice cream cone, or even just go for a walk in the park. Practice being a good listener and be an encouragement for whatever is going on in your friend’s life.

Create and Send a Card to a Friend

You don’t have to spend a lot on a card, handmade, personal cards will show how much you care even more and so will the words you put inside. Your little ones will love making cards for their friends too!

Get creative with drawing, stamping, painting, or cutting out pictures to make a collage. It might even be fun to get super crafty and make handmade paper to write the note on. Grab an envelope, put it in the mail, and let that friend know how much they are appreciated on National Friendship Day!

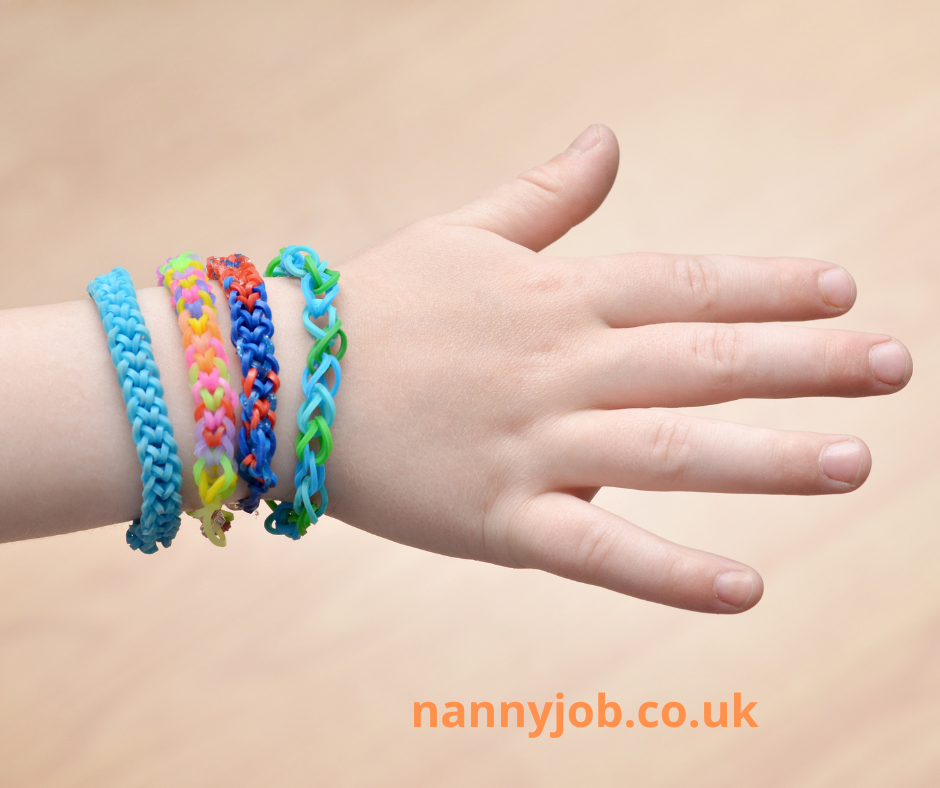
Friendship Bracelets.

How about making a friendship bracelet with your older children? For over 50 years friendship bracelets have been given as a sign of love and affection between friends. These handmade tokens can be large or small, intricate, or simple, but what is most important is that they are made with love! A quick search of the internet will soon show you how to make them!

Bake Friendship Bread

Your little ones will love doing this and what a super gift to give to those special people in their lives!

A tradition started by Amish people; friendship bread is made from a sourdough starter that is often given by a friend. Each time a loaf is made, a small portion of the starter is kept aside for the next loaf, which is perfect for National Friendship Day.

Because it contains yeast, the friendship bread starter is placed in a warm area where it is stirred daily and can “grow.” Keeping the starter alive means adding a few ingredients on certain days, like flour, sugar, and milk. It usually takes about ten days for the starter to be ready to make another loaf.

Once a person has the starter (or has patiently made one from scratch), this is a delicious bread that is easy to make, including ingredients like flour, eggs, baking soda and cinnamon. Because it uses a lot of sugar to make the yeast grow, Amish Friendship bread has a delightfully sweet flavour to it, suitable for toasting or simply eating slathered with butter.

Get Craft Happy For The Jubilee!

Let’s face it, even the least patriotic of us will be finding it hard at the moment to escape the media frenzy around the Queen’s Platinum Jubilee in June, and for those who do love a bit of classic English patriotism, why not get involved in your own creative way?! If you have toddlers or older children in your care, this is the perfect excuse to get their creative juices flowing, whilst teaching them a little bit about our monarchy at the same time!

Let’s face it, even the least patriotic of us will be finding it hard at the moment to escape the media frenzy around the Queen’s Platinum Jubilee in June, and for those who do love a bit of classic English patriotism, why not get involved in your own creative way?! If you have toddlers or older children in your care, this is the perfect excuse to get their creative juices flowing, whilst teaching them a little bit about our monarchy at the same time!

So, I hear you ask, what kind of things can we make?! Here are a few of our best ideas to keep children happy and creative in time Jubilee celebrations:

Make Bunting:

You will need:

  • A length on string as long as you want your bunting to be
  • Coloured sheets of card in red, white and blue
  • A pencil
  • Sellotape
  • Scissors

This is a basic way of making bunting, so that little children can be involved as there is no material to stitch. Simply make a triangular template and get the children to draw around it onto the coloured card. Cut out the drawings and get the children to put them in order – red, white, blue, red, white, blue and so on. Fold about a centimetre of the top of the triangles over the string, and attach down on one side with a piece of Sellotape. Do this all the way along your string, and then attach the bunting either inside or outside the house! This is a fantastic exercise for fine motor skills, as well as recognising shapes and colours for children.

Make a Crown:

You will need:

  • A piece of cardboard around 4 inches wide, and long enough to go around the child’s head and overlap slightly
  • A strip of tin foil around 5 inches wide, and the same length as the cardboard
  • Scissors
  • Crayons, glitter, or stickers
  • Glue
  • Stapler

Glue the length of tin foil on top of the length of cardboard, matching the bottom edges up, so that there is an inch extra of foil at the top. Now, cut zig zags into the foil all the way along the top, giving a crown effect of lots of points going across the top. Now it’s time to really have some fun and decorate, using glue, glitter, crayons or stickers, let your little ones go to town on their individual crown decoration on top of the tin foil. When the decorations have dried, make a ring with the crown and staple each end together, to fit over the child’s head.

Union Jack cupcakes (makes 12):

What you need:

  • 4oz caster sugar
  • 4oz margarine
  • 4oz self raising flour
  • 2 eggs
  • 1 tsp vanilla essence
  • 1 tsp baking powder
  • 12 white cupcake cases

For the icing:

  • 1 packet white ready roll icing
  • Apricot jam
  • Blue and red food colouring pens

 Method:

  • Line a cupcake tin with 12 cupcake cases and preheat the oven to 180 degrees.
  • Cream together the sugar and margarine with an electric mixer. Gradually add the eggs, flour, vanilla essence and baking powder whilst mixing.
  • Half fill the cupcake cases and put into the oven for 20-25 minutes until golden and well risen. Take the cupcakes out of the oven and place onto a wire rack to cool.
  • Roll out the icing to around 3mm thickness, then use a circular cutter to cut out 12 circles.
  • Put some apricot jam into the microwave for 20 seconds to make it runny. Brush the cooled cupcakes with the jam, and then place the icing circles on top so that they stick. Draw a basic union jack with your blue and red pens on to the icing on each cupcake.

You now have some really Royal treats!

Adding to the ideas we’ve given, why not try making some red, white and blue pompoms, or get some plain white serviettes and get the children to colour some red and blue onto them, or even onto a plain white paper tablecloth. There are hours of fun to be had, all in the name of Queen and country – have fun!

9 nifty Easter activities

Welcome to our #9nifty series. We’re starting with 9 Easter activities for kids of all ages…


1. Eggs inside eggs

This was tricky for the 2 year old!

How to : Put little foil wrapped chocolate eggs into a ballon and blow it up, cover with the outside of the balloon with glue then wrap string/wool/embroidery thread around it (leaving enough space to take the balloon pieces out but not so much that the eggs can escape) and glue again. Hang them up to dry and when they’re ready pop the balloon and take the pieces out carefully ! Experiment with blowing the balloon up to different sizes or different types of string.

Focus on : Fine motor skills


2. Chocolate easter nests

How to : Melt chocolate, mix with shredded wheat, shape into nests and allow to cool!

Focus on : Numeracy/science – pouring and measuring, melting and solidifying


Simple yet effective...

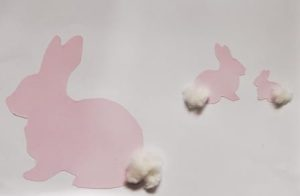
3. Silhouette bunnies

How to : trace around the bunny, or make a stencil to paint over and make a fluffy cotton tail to stick on!

Focus on : Understanding the world/The World and Traditions in other countries. Talk about the Easter bunny who bring the eggs. Some other countries have the same tradition although in Sweden, Austria and Germany it’s a hare and in France it’s the bells who bring the chocolate ! What’s the tradition in their family ?


4. Easter egg scavenger hunt

How to : Hide your Easter eggs around the house or the garden and write clues. Read the clues together and find where the eggs have been hidden !

Focus on : Problem solving and memory skills

Upcycled junk mail makes a pretty egg!

5. Collage Easter egg cards

How to : Fold A4 paper/card into half and then half again. With a craft knife cut out a shape of an egg from one qurter, this will be the front of your card. Make a collage onto thenow exposed quarter (you might want to mark it while it’s folded) and wait for it to dry. Refold and admire the colourful egg !

Focus on : Colour recognition and decision making.

6. Hand and footprint bunny

How to : Make handprints and footprints in pink paint and cut them out, leaving a reasonable margin. Take 2 paper plates and cover them in cotton wool. Join them together to create the head and body of the bunny. Stick on some googly eyes, black pipe cleaner or strips of felt for whiskers , a pink heart for a nose, the hand prints for ears and the foot prints for feet.

Focus on : Talking about textures. This is a sensory rich activity with sloppy, sticky paint and fluffy cotton wool.

7. Easter bonnet

How to : Buy a cheap wide brimmed hat, or improvise ! Decorate the hat by painting it or covering it with fabric, cut egg cartons open and paint them to make flowers, attach ribbons and feathers, let your imagination run wild !

Focus on : Understanding the World/ People and communities.Talk about the tradition of Easter bonnets. In the past people put flowers on a hat to celebrate spring and wore new clothes at Easter. In America there were big Easter bonnet parades. In the past, people used to wear hats to church.

Peek-a-chick

8. Peekaboo chicks

How to : Cut a small egg shape out of card and then cut it in half horizontally (or if you’ve made collage cards just use your pre-cut egg shapes). Attach the two halves one side of a clothes peg, one at the top and one at the bottom. Draw a small chick and cut it out. Attach it to the other side of the clothes peg behind the egg top so when you pinch the peg together to the open it you’ll see the chick!

Focus on : Object permanence for babies and Knowledge of the World (eggs hatching)

9. Bunny whiskers mask

How to : Take some pipe cleaners and attach them to a lollipop stick (or two or three taped together for stability). Add a pompom for a nose and create some adorable bunny whiskers

Focus on : Role play – make bunny faces and hop like bunnies !